I was looking for a minimalist J pole type mount to use with the Tempest and was surprised to find that the max Tempest pole mount diameter of 1.315" was a huge limiting factor. After several hours of searching I came across this mount on Amazon, that after some easy(ish) modification works very well. Here’s how I did it if you’re interested in using this mount:
1” PVC pipe has an outer diameter of 1.315" which coincides perfectly with the inner diameter of this mount. However, the opening at the top of the mount is likely to be slightly deformed which will make it difficult if not impossible to slip the PVC pipe into the mount. Since I didn’t need the cable opening (or rubber grommet) in the mount, I used a power miter saw to cut off a couple of inches off top of the mount just below the bottom of the cable opening. The mount is made of aluminum and cuts well with a carbide blade. I placed a wrap of painters tape at the cut location, easily cut it with a power miter saw and cleaned up the cut edges with a bit of 220 grit sandpaper. With the small section of the mount cut off, the tube is nearly perfectly round and allows the PVC pipe to be inserted into the mount. Note that it’s a tight fit and you’ll need twist the PVC into the tube. I managed to insert it approx. 5” and it’s definitely not going anywhere.
Before inserting the 1” PVC pipe into the mount, I painted it with some satin white spray paint, once the paint was dry, I applied a bit or exterior caulk to the joint where the PVC pipe mates to the mount.
Since I’m not routing any cables through the mount, and since I didn’t want any openings in the mount to become a potential home for bees/wasps/hornets, I cut a 1.5” length of PVC pipe in half, applied some caulk to the outside edges and slipped it in the mounting flange end of the mount to cover and seal the opening.
Lastly, I gave the entire assembly a couple of coats of satin white spray paint.
Figured I’d post some pix of my install, due to it’s somewhat less common installation location.
We recently moved to a waterfront home on a harbor off of the Long Island sound (in Connecticut/US), and the previous owner had a very outdated (nonfunctional at this point) weather station, so I figured I’d follow in his footsteps. But with more modern equipment. A bunch of online research led me to the tempest, and here I am.
I was lucky in that his prior mounting spot was still intact, even with a clearly marked angle for north. So after removing the old gear and an outdated security camera that was also there, I had an easy place to use the basic mounting plate.
I think this should work well to give me an accurate picture of the waterfront micro-climate that my house experiences. Any suggestions or thoughts welcome of course.
[here is my installation in Sanford FL mounted on a 10ft pole on the side of a story home so it’s higher than the Center pitch of the roof been up 3 days and a hawk is now using as an expensive perch need to order the spikes now.
I use to have an ambient weather station but upgraded to tempest so I had full integration to my rachio system
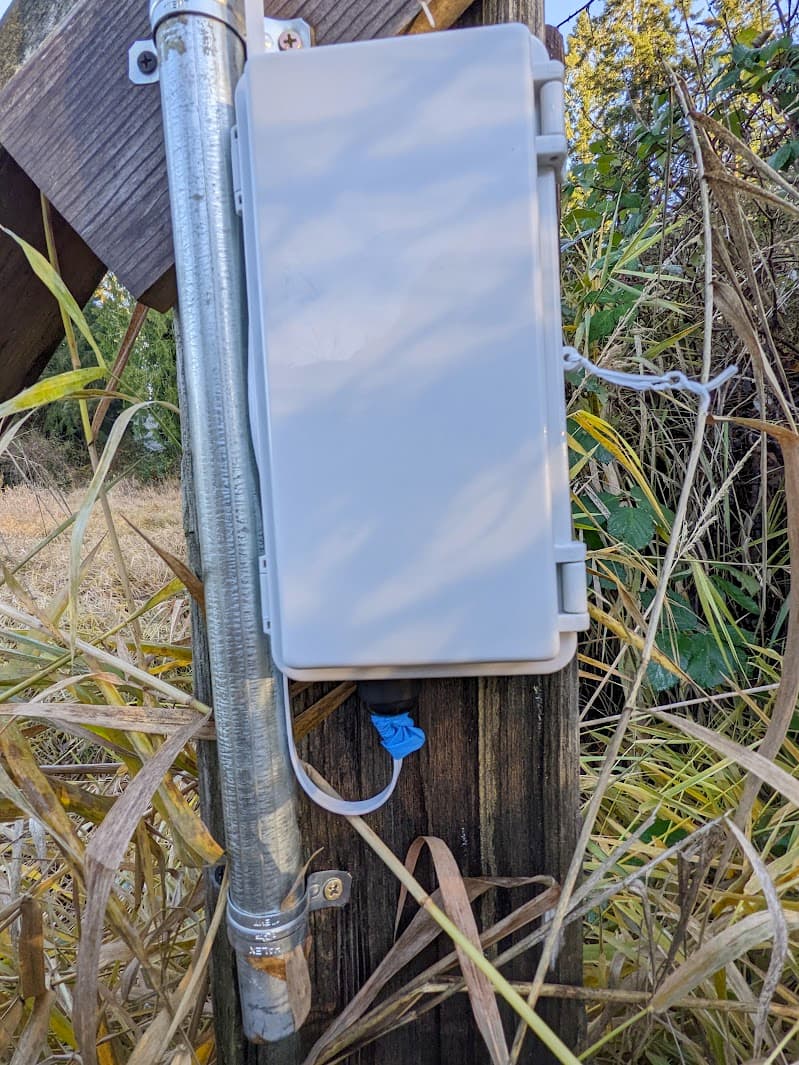
Here is a photo of my upgraded install. It’s a bit of overkill, but I wanted a rock solid install. Right now it sits about 3.5 feet above the ridge line. My goal is to get it to about 6 feet for good measure. Of course the Christmas lights are temporary.
The battery pack fits perfect unless you add the cover so I just omitted it. I also put the extra cable in the box wrapped up as well. Note the blue spots in the top corners and in the bottom are pieces of a latex glove that I used for additional gasket material for now. I’ll see how that holds up and when I upgrade maybe find something a bit more robust.
All finished it looks pretty tidy though…
And for now the cable is wrapped around the pole with some electrical tape helping out a bit. We’ll see how it performs and perhaps this summer I’ll drill out the conduit and run it down through that to make it a bit more wind resistant…
On battery power the Tempest is not supposed to charge until its battery voltage drops to a little over 2.4V,then it is supposed to boost the Tempest battery. This is to keep from running the batteries in the booster unnecessarily.
It’s been running between 2.1 and 2.3 pretty consistently lately so I’m pretty pleased to see it back in a good range. It likely hasn’t had a good charge since early Oct…
Nice job!!! Looks like it will do the job. I was able to install mine in the attic garage and ran the wires up to the Tempest out of the soffit vent. I have it running off the 12v power supply. We have a whole house genset so it would only be out of power for less than 10 seconds once the genny figures there’s no grid power.
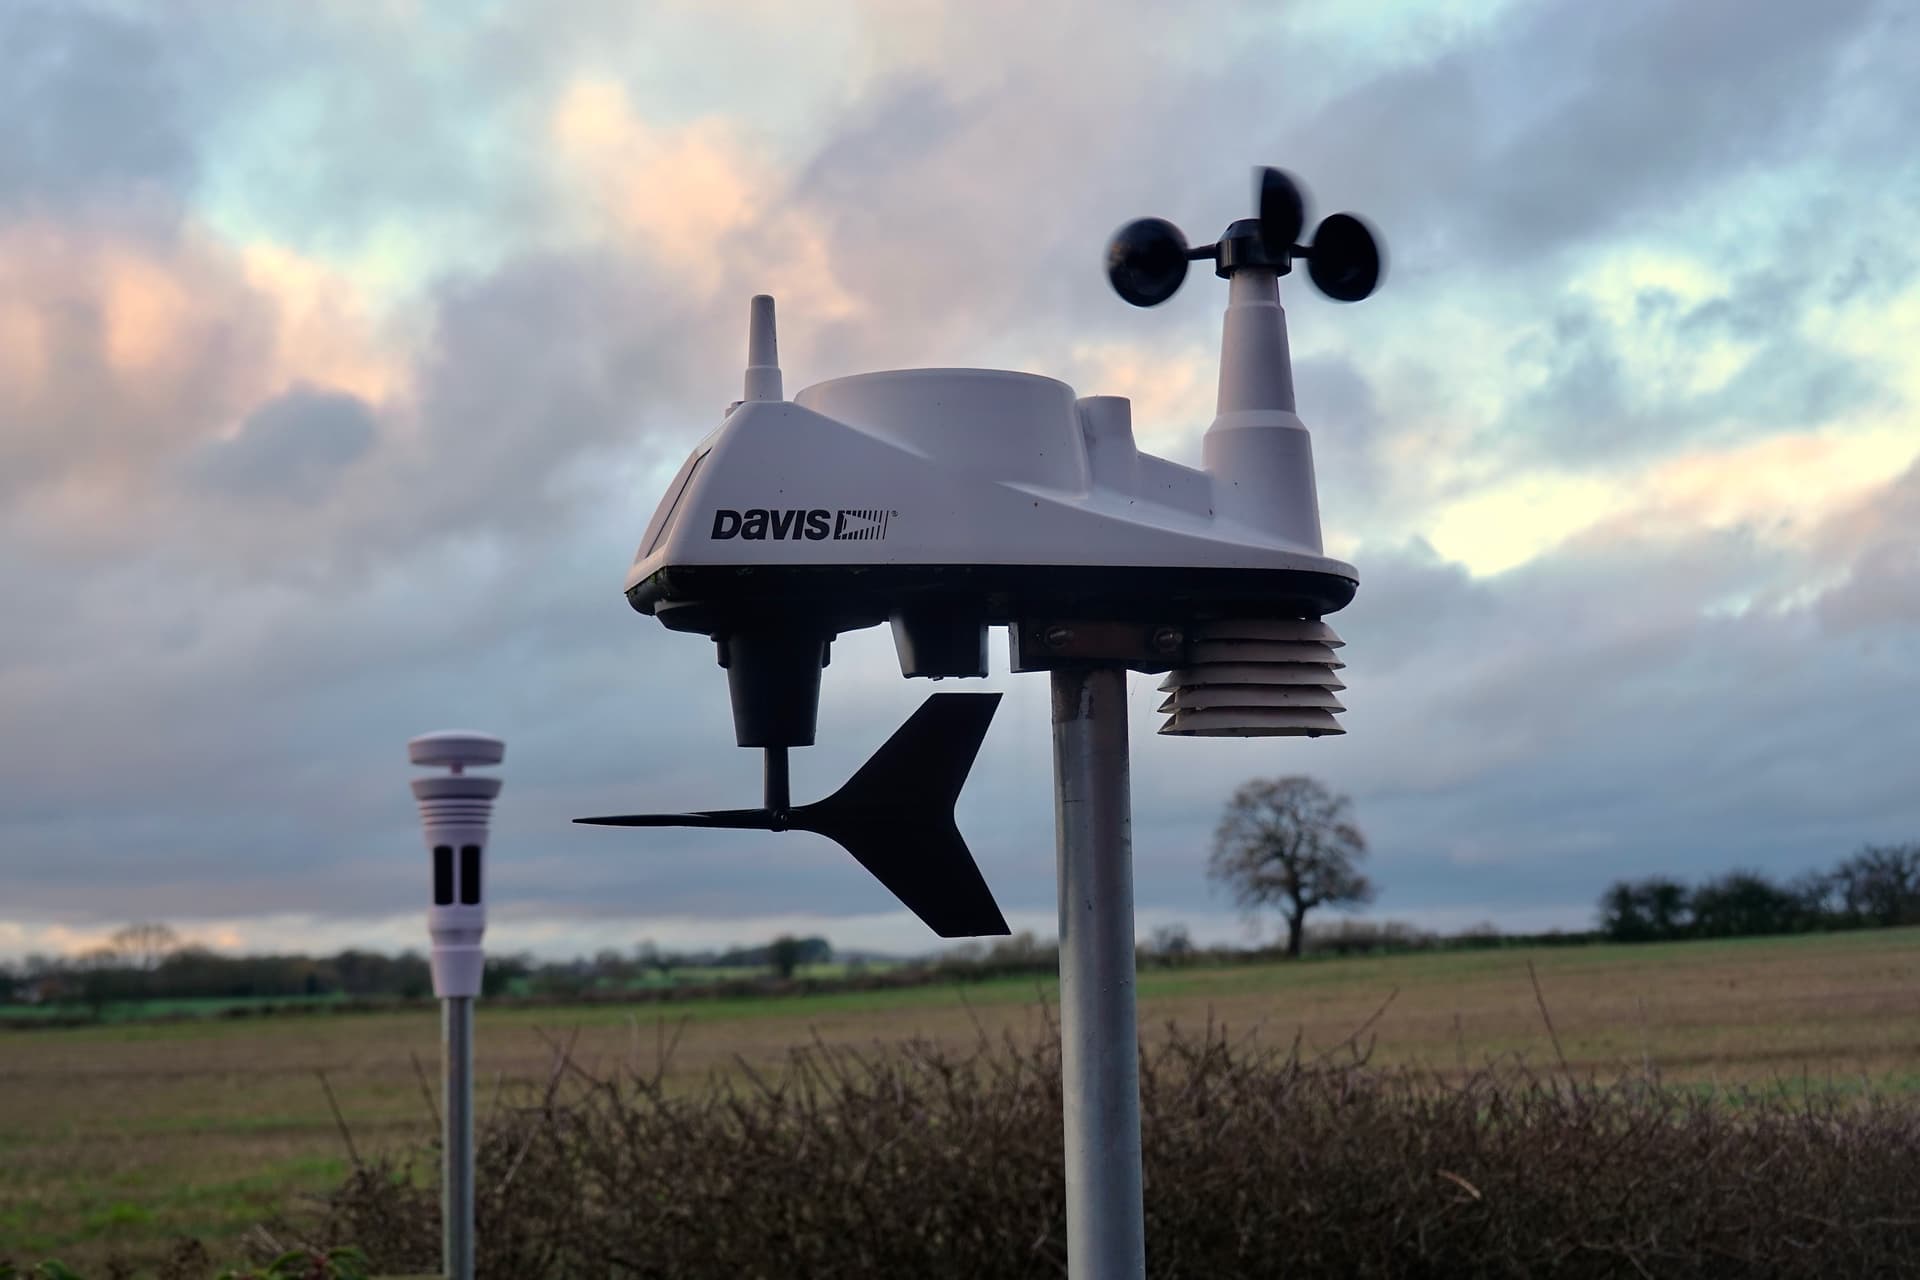
Installed my new Tempest 3 weeks ago, replacing a 10 year old Davis Vantage Vue. Located on Long Beach Island, NJ, 35 feet above street level. Easy access from a rooftop deck using a small step stool
I put my Tempest up this afternoon. Co-located with my Vantage Vue. Once I’m happy with the readings, I’ll shove the pole up about another 6’. All indications good and appearing on Wunderground almost instantly…trying to integrate into Weathercloud as I thought it was going to be pretty instant like WU but do I need hardware Metobridge? Any advice on that appreciated. First impressions all very positive